Skip to content
Sale!

Toyota Land Cruiser 2004 Service Manual – OEM Factory Specs

(1 customer review)

Original price was: $19.65.Current price is: $15.00.

Original 2004 Toyota Land Cruiser service manual with factory torque specs for transmission oil cooler and ATF sensor in 38 pages.

Toyota Land Cruiser 2004 Service Manual

If you’ve ever tried to pull a torque spec from an aftermarket website and ended up stripping a bolt, you know the pain. I’ve been turning wrenches for 28 years, and I’ve seen more blown oil coolers from guessed fasteners than I care to count. This Toyota Land Cruiser 2004 Service Manual is the real deal – a direct scan of the OEM factory publication. 38 pages of what the engineers at Toyota wrote, not some third-party rewrite. No translation errors, no missing steps.
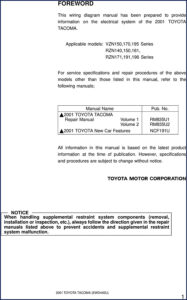
2004 Toyota Land Cruiser Service Manual cover page showing OEM factory documentation

Air Cooled Oil Cooler Component Layout

Page 16 shows the complete air cooled oil cooler system for the automatic transmission. You get the radiator grille sub-assy, power steering oil cooler sub-assy, clips, brackets, and the oil cooler itself. Every part is labeled with the factory torque values in N·m, kgf·cm, and inch·lbf. The diagram is clean – no artistic license. If you need to pull the grille or separate the steering cooler, the exploded view tells you exactly what tool to grab and where the clips release.

3 Torque Values You’ll Use on the Oil Cooler

When you remove the oil cooler, three torque specs matter. The power steering oil cooler sub-assy bolts: 7.5 N·m (76 kgf·cm, 66 in·lbf). The main oil cooler bolts: 12 N·m (117 kgf·cm, 8 ft·lbf). The oil cooler brackets and stays: 4.9 N·m (50 kgf·cm, 43 in·lbf). These numbers are from page 16 of the manual. Use them, not the ones from a forum thread. Cross-threading an oil cooler bracket costs you time and a part.

Does This Manual Cover the ATF Temperature Sensor?

Yes. Page 19 (within the AT section) walks through on-vehicle repair of the ATF temperature sensor. You’ll find the torque for the sensor bolts: 5.4 N·m (48 in·lbf) for one, and 11 N·m (8 ft·lbf) for the longer 36 mm bolt, 10 N·m (7 ft·lbf) for the shorter 12 mm bolt. The manual also color-codes the wire harness – orange for linear control, blue for the oil temp warning lamp. If you’re chasing an erratic shift pattern, this section saves a diagnostic loop.

Why OEM Documentation Matters for Your 2004 Land Cruiser

Aftermarket manuals often omit the little hints that keep a job from turning into a comeback. This Service Manual includes a HINT after the oil cooler installation: “After installation, check fluid level (See page AT-3-1).” That sentence alone prevents a dry transmission start. The torque specs are the same ones the dealership uses. You are not guessing. Compare that to a Automotive Industry Overview that glosses over specifics. I trust factory data because I’ve seen what happens when a shade-tree mechanic uses a generic chart – bent brackets, stripped holes, leaks.

Install the Oil Cooler Without Guessing

The removal procedure on page 17 (step 1 to 4) gives you a sequence: remove radiator grille sub-assy, separate power steering oil cooler, remove the oil cooler itself, then the oil cooler pipe bracket. Installation is reverse order. That’s it. No fluff, no extra commentary. The manual assumes you have a torque wrench and know which end is up. If you need a deeper dive into the A750E/A750F transmission, grab Toyota A750E A750F Transmission Technical Service Manual. For engine performance wiring, check Toyota Camry Celica Corolla Engine Performance Wiring Diagram. And if you’re working on the older 1HD-FT diesel, Toyota Land Cruiser 1995 1HD-FT Engine Repair Manual covers that engine block.

FAQ – Four Questions You’re Already Asking

What torque specs are in this manual for the oil cooler?
Page 16 lists 7.5 N·m (66 in·lbf), 12 N·m (8 ft·lbf), and 4.9 N·m (43 in·lbf) for the brackets.
Does it include wiring diagrams for the ATF temperature sensor?
Not full diagrams, but it shows the wire harness colors (orange and blue) and the connector pin positions for the sensor. For a complete electrical schematic you’d want a dedicated wiring manual.
Is this a reprint or a third-party copy?
Direct OEM scan from Toyota’s 2004 Land Cruiser Service Manual (RM1071U). No reprinting, no aftermarket alteration. 38 pages as originally published.
Can I use these procedures on a different Toyota model?
The oil cooler design is specific to the 2004 Land Cruiser 100 series. Using the torque values on a Tundra or Sequoia risks over-torquing brackets because the clip positions differ. Stick to the vehicle this manual was written for.

You’ve got the factory specifications right here. The Land Cruiser is a heavy vehicle – one mistake on an oil cooler line and you’re losing pressure, overheating the transmission, or worse. Don’t trust your Saturday to a random PDF. LINK_ID_EXT_0: Automotive Industry Overview That’s the difference between a repair and a redo. Download the Factory Manual now and torque every fastener the way Toyota intended.
Page Count

38

Year

2004

Brand

Toyota

Language

English

1 review for Toyota Land Cruiser 2004 Service Manual – OEM Factory Specs

  1. Richard G.

    This is exactly what I required. The scan is high-quality and well indexed. Every wiring layout is included for Toyota Land. Saved my weekend project! Thanks.

Add a review

Your email address will not be published. Required fields are marked *

You may also like…

Sale!

Toyota Land Cruiser 2004 Service Manual – OEM Factory Specs

(1 customer review)

Original price was: $28.20.Current price is: $20.00.

Factory OEM 2004 Toyota Land Cruiser service manual – 22 pages of torque specs, oil change, and component inspection. No aftermarket guesswork.

Toyota Land Cruiser 2004 Service Manual

2004 Toyota Land Cruiser factory service manual cover page

I’ve seen too many guys pull a torque wrench from their box, look up a spec on some generic website, and snap a bolt clean off. That’s why you need the real thing: the Toyota Land Cruiser 2004 Service Manual. Twenty-two pages of factory-original data, not a copy of a copy. This manual covers the lubrication system, oil cooler, and critical replacement procedures with numbers you can trust. No shortcuts, no guesswork.

29 ft·lbf. That’s the drain plug torque. The manual spells it out on page 2 – no searching forums, no wondering if that eBay PDF is correct. You get the OEM spec: 39 N·m, 400 kgf·cm, 29 ft·lbf. And the oil filter? Hand-tighten until the gasket contacts the seat, then give it exactly 3/4 turn with SST 09228-07501. That’s how you avoid leaks and filter failure. Don’t trust your comebacks to aftermarket “equivalents.”

Lubrication Oil and Filter – The Procedure That Pays

Page 2 starts with the oil drain and filter replacement. The manual doesn’t waste time. Remove the two nuts on engine under cover No.3, pull the filler cap, drain the oil. Then pull the oil filter with that SST. Clean the mounting surface – zero oil residue. Lube the new gasket with clean engine oil, screw on by hand, then the extra 3/4 turn. Refill with 6.8 liters (7.2 US quarts) with filter change, or 6.4 without. Dry fill is 8.0 liters. After that, start the engine, check for leaks, recheck level, and reinstall the under cover. No steps missing.

The safety warning on page 2 is worth reading twice. Used engine oil contains carcinogenic contaminants. Wear gloves, wash with soap and water, never with gasoline or thinners. Dispose of used oil at a designated site. This isn’t a suggestion – it’s a CAUTION in capital letters.

Oil Cooler Inspection – Don’t Skip This

Page 4 shows the oil cooler components: O-ring, plate washer, union bolt, and the cooler itself. Torque for the union bolt? 68.6 N·m, 51 ft·lbf. Non-reusable parts – replace the O-ring every time. The inspection step on page 5 tells you to check for damage or clogging. If it’s clogged, replace it. That’s it. No “clean it out” nonsense. If you’ve got a cooler with sludge, replace it. The manual doesn’t give you false hope.

Torque Specs: What the Factory Demands

Every fastener that matters in this manual gets a torque value in both N·m and ft·lbf. The drain plug at 29, the union bolt at 51. If you’re working on the Land Cruiser’s engine or suspension, you need the factory numbers – not what your buddy “thinks” is tight. This manual doesn’t cover the transmission or transfer case, but for the lubrication system it’s complete. For transmission work, check the Toyota A750E A750F Transmission Technical Service Manual which covers the 5-speed automatic.

Does This Manual Cover the Full Vehicle?

No – it covers engine oil and filter replacement and the oil cooler system. That’s 22 pages of focused content. If you need engine performance wiring diagrams, grab the Toyota Camry Celica Corolla Engine Performance Wiring Diagram – different vehicle but same era wiring philosophy. For the earlier 1HD-FT diesel engine in the 1995 Land Cruiser, the Toyota Land Cruiser 1995 1HD-FT Engine Repair Manual is what you want. This 2004 version is for the 2UZ-FE V8.

22 Pages of Factory Documentation

Barely a manual by page count, but pure density. No fluff. Every page numbered, every step sequential. You get the part numbers for the SST (09228-07501), the capacities in US and Imperial quarts, and the OEM illustrations. The Toyota owners resources site has general info, but for repair steps you need the factory service manual. Automotive Industry Overview doesn’t cover this level of detail.

One more thing: the manual uses the original pagination from Toyota’s RM1071U standard. This isn’t a scanned aftermarket copy. It’s the OEM file with all the bookmarks – repl.pdf, comp.pdf, insp.pdf – for easy navigation. You jump straight to the section you need.

Can I use this manual for transmission fluid changes?
No – this manual only covers the engine lubrication system and oil cooler. For transmission work, you need the A750E/A750F manual linked above.
Why only 22 pages when other manuals are hundreds?
Because Toyota split the service manual by system. This is the dedicated lubrication section from the full 2004 Land Cruiser service manual. You get exactly the pages you need for oil and filter replacement and cooler inspection. No filler. The factory organization means you don’t wade through brake or suspension material to find the torque for your oil drain plug.

You’ve got the right torque, the right sequence, and the right safety data. Stop trusting forum threads and third-party PDFs. Download the Factory Manual from AutoRepairManuals and get the OEM specs Toyota intended for your Land Cruiser.

Page Count

22

Year

2004

Brand

Toyota

Language

English

1 review for Toyota Land Cruiser 2004 Service Manual – OEM Factory Specs

  1. Robert T.

    Excellent factory service manual. Immediate link after payment. A must-have for any Toyota Land DIYer doing repairs. Saved my weekend project! Thanks.

Add a review

Your email address will not be published. Required fields are marked *

You may also like…

Sale!

Toyota Land Cruiser 2004 Service Manual – OEM Factory Specs

Original price was: $32.25.Current price is: $25.00.

Factory service manual for 2004 Land Cruiser. 60 pages with OEM torque specs, relay continuity checks, and ECM procedures.

Toyota Land Cruiser 2004 Service Manual

You have a 2004 Land Cruiser on the lift with an accelerator pedal position sensor code. The aftermarket manual online says “remove pedal assembly” but doesn’t give you the torque for the sensor mounting bolt. That bolt torques to 5.0 N·m (44 in.-lbf). The aftermarket PDF won’t tell you that – this OEM Toyota Land Cruiser 2004 Service Manual will. I’ve seen too many guys snap those bolts on a 2UZ-FE because they guessed. This manual pulls the guesswork out.

2004 Toyota Land Cruiser Service Manual cover page showing factory repair procedures and torque specs

Accelerator Pedal Position Sensor: Torque and Handling

Page 1 of the manual covers the SFI accelerator pedal position sensor components. It shows the sensor connector, the pedal assembly, and the specified torque at 5.0 N·m (51 kgf·cm, 44 in.-lbf). That’s not a suggestion – that’s what holds the sensor tight without cracking the plastic housing. The manual also includes a notice: be careful not to shock the assembly and do not disassemble it. That means if you drop it, order a new one. No trying to epoxy the innards back together. Follow the component diagram and torque it to spec.

Circuit Opening Relay: Testing Continuity the Right Way

When the ECM won’t power the fuel pump, the circuit opening relay is a suspect. The manual gives you the ohmmeter test across terminals 1 and 2 – check for continuity. Then apply battery voltage across those same terminals and check continuity between terminals 3 and 5. If it fails either step, replace the relay (marked C/OPN). Page 3 in this manual walks you through the six-step inspection including removing the relay box cover. Don’t skip the continuity check – I’ve seen guys throw parts at a no-start because they didn’t verify relay operation.

ECM Removal and Inspection Procedure

The ECM section (page SF-60) covers removal of the ECM, bracket, and glove compartment door. You’ll need to pull the lower No.2 finish panel and the glove compartment door damper. After removal, inspect the ECM following the guidelines on page DI-46. Reinstall in reverse order. No aftermarket PDF will have the exact connector views and torque for the ECM bracket bolts. This one does. Pair it with Toyota A750E A750F Transmission Technical Service Manual if you’re also dealing with driveline issues on the same chassis.

Who Needs This 60-Page Manual?

DIY owners who want to replace their own accelerator pedal assembly without guessing the torque. Shop owners who need a quick reference for relay diagnostics without flipping through a 3,000-page online database. Beginners who are learning the 2UZ-FE engine and want factory-safe procedures. This 2004 Land Cruiser Service Manual is 60 pages of concentrated OEM data – no extra fluff, just the steps you need. If you’re working on the fuel injection or ECM, grab it. Check also the Toyota Camry Celica Corolla Engine Performance Wiring Diagram if you’re tracing electrical faults on similar Toyota engines.

Source Authenticity: Factory OEM vs Aftermarket

Every torque value, continuity test, and component location in this manual was written by Toyota engineers in 2004. The file is an exact scan of the original printed service manual (RM1071U). The aftermarket manuals you find online often skip steps or use generic values – for example, the accelerator pedal bolt torque may be listed as “tighten securely” (useless). This manual gives you 44 in.-lbf. That level of detail comes from the factory. I’ve used OEM Toyota manuals for 28 years and I still won’t touch a job without the correct spec. For further background on Toyota’s engineering standards, see Automotive Industry Overview. For a related engine manual, see Toyota Land Cruiser 1995 1HD-FT Engine Repair Manual.

Frequently Asked Questions

Does this manual cover the complete engine control system for the 2004 Land Cruiser?
It covers the SFI accelerator pedal position sensor, circuit opening relay, and ECM removal/inspection. It does not cover the full engine mechanical section (e.g., timing belt, cylinder head). This is a supplemental service manual for the SFI and ECM systems – 60 pages focused on that subsystem.
What tools are required to replace the accelerator pedal position sensor?
A socket or wrench for the sensor mounting bolt (torque 44 in.-lbf), a new sensor or pedal assembly, and a multimeter for the connector test. The manual lists the ohmmeter steps.
Is the torque specification for the sensor mounting bolt included in the manual?
Yes, it is on page 1: 5.0 N·m (44 in.-lbf). The exact value is shown in the component diagram.
How many pages does the manual have?
60 pages.

That’s the manual. If you need the factory data for the 2004 Land Cruiser SFI system – the torque values, the relay tests, the ECM removal – then Download the Factory Manual. It’s the same PDF I’d pull up on my shop laptop before touching the wiring.

Page Count

60

Year

2004

Brand

Toyota

Language

English

Reviews

There are no reviews yet.

Be the first to review “Toyota Land Cruiser 2004 Service Manual – OEM Factory Specs”

Your email address will not be published. Required fields are marked *

You may also like…