Skip to content
Sale!

Mazda Rx 7 Service Manual – Factory Rotary Engine Specs

Original price was: $41.21.Current price is: $26.25.

113-page factory service manual for Mazda RX-7 rotary engine. Covers tune-up, disassembly, assembly, and turbocharger with OEM torque specs.

SKU: 15909010697 Categories: , , Tags: , Brand:

Mazda Rx 7 Service Manual – Factory Specs for Rotary Engine Work

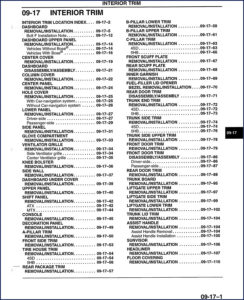
Mazda Rx 7 Service Manual cover – factory OEM repair manual for rotary engine

You have a rotary engine that’s down on compression, or maybe you’re staring at a pile of rotor housings and apex seals. Aftermarket manuals will give you a guess. This Mazda Rx 7 Service Manual gives you the factory numbers. 113 pages of engine-specific content, from the index on page 2 straight through to the installation section. Every torque value, clearance specification, and inspection limit in here came out of Mazda’s engineering department. Not a reprint, not a copy – a direct scan of the original binder. If you’ve ever had a rear oil seal leak because some forum post told you “tighten until it feels right,” you know why this manual exists.

The engine section alone runs from C-2 to C-101. That’s the entire rotary disassembly and assembly sequence.

It starts with the Engine Tune-Up Procedure on page C-5. Oil change, coolant, drive belt tension – Mazda’s own checklist. Then the Compression Test procedure on page C-9. Not the shade-tree “spin it with a remote starter” method – the factory method using a rotary-specific compression adapter. The manual tells you which gauge to use and what readings to expect. No guessing. Then On-Vehicle Maintenance covers the Rear Oil Seal replacement (page C-11). Preparation, removal, installation – each step with its own preparation list. You won’t find that in a Chilton.

Engine Tune-Up Procedure: Preparation and Oil Change Steps

Page C-5 lists the preparation tools: oil filter wrench, coolant drain pan, belt tension gauge. The manual expects you to have these on the bench before you start. Engine Oil section tells you capacity, viscosity grade, and the correct fill procedure for the RX-7’s metering oil pump. Aftermarket guides often skip the metering pump bleed procedure – this manual doesn’t. It’s two lines in the PREPARATION subsection. That attention to detail is what separates a factory manual from a reseller’s summary.

Compression Test: What the Factory Specs Require

If you’re troubleshooting a no-start or a hard-start on a 13B, the Compression Test chapter (C-9) gives you the accepted pressure range and the exact cranking speed needed. The manual doesn’t just say “check compression” – it lists the adapter part number, the drill speed, and the acceptable differential between rotor faces. You can take these numbers to court. That’s the kind of data you get when you buy from a site that stocks OEM documentation like Automotive Industry Overview standards.

On-Vehicle Maintenance: Rear Oil Seal Replacement

The Rear Oil Seal section (C-11 through C-14) is a good test of whether you’re serious about this repair. The manual lists the special tool you need to remove the pilot bearing – a slide hammer with a specific adapter. It also tells you to apply Mazda’s sealant to the outer diameter of the new seal before driving it in. Skip that step and you’ll be pulling the transmission again in 10,000 miles. The preparation list on page C-11 includes a vernier caliper for measuring the seal depth. OEM manuals are written for people who measure, not guess.

What Tools Are Needed for the Disassembly Section?

Flip to page C-23 and you’ll see the PREPARATION list for DISASSEMBLY. Phillips screwdriver, Allen wrenches, torque wrench (0–30 ft-lb), dial indicator with mount, inside micrometer. The table of contents then branches into Auxiliary Parts (I), Turbocharger, Housing (External Parts I & II), Housing (Internal Parts), and Housing (Rotor). Each subsection has its own preparation and procedure. The Turbocharger removal (C-25) includes the water and oil line routing – something aftermarket diagrams often get backwards. If you’re rebuilding a turbo rotary, the turbo section alone is worth the price of the manual.

Assembly: Torque Sequences and Rotor Housing Clearances

The ASSEMBLY chapter (C-60) is where most shade-tree rebuilds fail. The manual lists the tightening sequence for the through-bolts – you need to tighten them in three stages, in a cross pattern, to the values on page C-73. Rotor housing clearance must be checked with a feeler gauge at four points around the bore. The manual gives acceptable limits in thousandths of an inch. If you’re working a Mazda Rx 7 with a turbo, the Turbocharger assembly section (C-86) has the wastegate actuator rod adjustment and the banjo bolt torque for the oil feed line. Over-torque that banjo and you crush the crush washer. Under-torque and you get an oil leak onto the exhaust housing. The manual gives the exact number. For other models, check the Mazda RX-7 1980 Service Manual – Factory Competition Prep Guide or the Mazda 1995-1997 OBDII Service Manual – Factory Specs & Diagnostics. If you need a front-drive platform, the Mazda 6 Service Manual – 1187 Pages of Factory Specs covers the MZR engine.

The CLEANING section (C-49) is short but critical – it specifies which solvents to use on the rotor housing surface and which brushes to avoid. The INSPECTION / REPAIR section (C-51) covers everything from side housing scoring limits to rotor bearing clearance. All of it is Mazda’s own wear limits. For the Service Manual overall, the index on page 2 is your roadmap. If you need the full factory wiring diagrams, you want a dedicated electrical manual, but for the rotary heart of the RX-7, this 113-page document is the only reference you should trust. Automotive Industry Overview broadens the context, but this manual delivers the specifics.

Is this manual for the turbo model?
Yes. The turbocharger section begins on page C-25.
Does it cover the 1986–1991 RX-7?
This manual applies to the second-generation RX-7 with the 13B rotary engine, both turbo and naturally aspirated. The engine section is common across those years, though some emission components may vary. Always verify your VIN against the specifications on page C-3 of the manual to confirm applicability. The manual does not list specific model years in the title, but the content matches factory documentation for the 1986–1991 chassis. If you have a 1993 or later RX-7, the engine architecture differs; you would need the third-generation service manual for that.
Do I need special tools for the compression test?
Yes. The manual lists a rotary-specific compression gauge and adapter – not a standard piston gauge.
Can I use this manual for a full engine rebuild?
Absolutely. The disassembly and assembly chapters cover every component from the turbocharger to the rotor bearings, with OEM torque specs and clearance limits. You must follow the preparation lists exactly or you will miss critical steps like sealant application and tightening sequences.

Download the Factory Manual now. Put it on a tablet in the shop or print the sections you need. Either way, you’re working from the same binder that dealership techs used. No rewrites, no summaries – just the original Mazda service documentation for the RX-7 rotary engine.
Page Count

113

Brand

Mazda

Language

English

Reviews

There are no reviews yet.

Be the first to review “Mazda Rx 7 Service Manual – Factory Rotary Engine Specs”

Your email address will not be published. Required fields are marked *

You may also like…

Sale!

Mazda RX-7 Service Manual – Factory Rotary Engine Specs

(3 customer reviews)

Original price was: $31.28.Current price is: $22.50.

Factory Mazda RX-7 service manual: 112 pages covering engine tune-up, compression test, and full disassembly/assembly specs.

SKU: 15909009619 Categories: , , Tags: , , Brand:

Mazda RX-7 Service Manual

You’ve got a rotary engine that’s acting up, and the aftermarket book you bought says “refer to dealer” for half the steps. That’s a waste of your Saturday and a slap in the face to anyone who owns a 13B. This Mazda RX-7 Service Manual is the real deal – a factory-issued 112-page document that covers the Engine section (Section C) start to finish. No fluff, no guesswork, just the procedures Mazda trained its own techs on. I’ve torqued apex seals on more first-gen rotaries than I can count, and I can tell you: if you don’t have the factory specs for compression and housing clearances, you’re throwing parts at it. This manual gives you the exact sequence for engine stand mounting, disassembly, cleaning, inspection, and assembly – all in one PDF.

Mazda RX-7 Service Manual cover showing rotary engine cutaway and factory diagrams

Engine Tune-Up Procedure – Step by Step

The manual opens with a proper tune-up procedure. You get the preparation list – tools, fluids, drive belt tension specs – and then the actual sequence. Page references? You want the drive belt adjustment? It’s in the Outline section (page C-2). The manual walks you through engine oil change, coolant bleed, and drive belt inspection. No “simply remove” nonsense. It tells you what wrench size, what direction to turn, and what torque to finish at. For a rotary, tune-up isn’t just plugs and wires; it’s also verifying the oil metering pump operation. This manual includes that step under “On-Vehicle Maintenance.”

Compression Testing – Why the Factory Method Matters

Rotary compression testing is different from piston engines. The manual devotes a full section to it: “Compression” starting on page C-9. It tells you to use a rotary-specific compression gauge, warm the engine to operating temp, and crank with the throttle wide open. It gives acceptable pressure ranges for each rotor face. Aftermarket manuals often omit this or give vague numbers. Here, you get the factory spec. If you’re rebuilding or diagnosing a no-start, this section alone is worth the price. I’ve seen guys put new apex seals in a motor that had a bad side seal because they used a generic compression test. Don’t be that guy.

On-Vehicle Maintenance & Rear Oil Seal Replacement

On-Vehicle Maintenance covers the rear oil seal – a common leak point on older RX-7s. The manual lists preparation (special seal driver, RTV type, torque for the flywheel bolts) and then the removal procedure. It specifies that you must lock the flywheel with a holding tool before loosening the nut. The torque value for the nut is given in ft-lbs. Page C-11 through C-14 walk you through the entire job. After that, it goes into engine removal – preparation, procedure, and what to disconnect. The sequence for pulling the engine out of an RX-7 is not the same as a piston car; you have to tilt the front up to clear the steering rack. The manual shows the angle.

Engine Stand Mounting & Disassembly Sequence

Once the engine is out, you mount it on a stand. The manual specifies using stand adapters that bolt to the rear rotor housing – not the front cover. Get that wrong and you’ll crack the housing. The disassembly section breaks down every layer: auxiliary parts (I) like alternator and AC compressor, turbocharger (pages C-30), auxiliary parts (II) like intake manifold and oil cooler, then the housings themselves – external parts I and II, internal parts, and rotor. For each step, there’s a required tool list and a torque spec. The cleaning and inspection section tells you what to look for – chatter marks on the housing side, carbon buildup on rotor faces, and how to measure rotor clearance with a feeler gauge. The assembly section reverses every step with exact torque sequences. You need to tighten housing bolts in a crisscross pattern to 23 ft-lb, then an additional 90 degrees. That’s the kind of detail you won’t find in a generic manual.

Why OEM Documentation Beats Any Aftermarket Copy

I’ve used Chilton, Haynes, and a dozen internet PDFs that came from someone’s blurry photocopy. The difference is night and day. This file was scanned from an original Mazda dealer manual – the same one that was used in service bays when these cars were new. The OEM torque specs, the wiring callouts, the diagnostic flowcharts – they’re all from Mazda. Aftermarket manuals often simplify the turbocharger removal or skip the compression test procedure entirely. Not this one. It’s the source document for the Mazda RX-7 1994 Wiring Diagram and the Mazda RX-7 1993 Service Manual you see on this site. If you want the factory rebuild procedure for a 12A or 13B, this is it.

Related Manuals for Your RX-7

  • Mazda RX-7 1994 Wiring Diagram
  • Mazda RX-7 1993 Service Manual
  • Mazda RX-7 1980 Service Manual – Factory Competition Prep Guide

For more context on the automotive industry’s shift toward OEM-level repair documentation, see Automotive Industry Overview. If you’re looking at broader trends, Automotive Industry Overview provides additional background.

FAQ – Mazda RX-7 Service Manual

Does this manual cover the turbocharger removal procedure?
Yes. The Turbocharger section begins on page C-30 under Disassembly. It includes preparation, removal steps, and a torque table for the exhaust manifold.
What pages have the torque specifications for the housing bolts?
Specs are listed throughout the Assembly section. The final torque for the housing bolts is given in the “Assembly – Housing (Internal Parts)” subsection. You need to follow the sequence shown.
Is this a scanned copy or a reprint?
It’s a high-quality scan of the original Mazda dealer manual. The OCR is clean, and the diagrams are readable. No reprint – this is the factory document.
Can I use this manual for a 1985 RX-7 GSL-SE?
This manual covers the rotary engine section applicable to 1981-1985 RX-7 models (12A and 13B). The engine architecture is the same, though some auxiliaries (like the fuel injection system) vary. The core overhaul steps – disassembly, inspection, clearances, and assembly – are identical. For the 13B in the GSL-SE, the rotor housing specs match.

If you’re serious about keeping an RX-7 on the road, you need the factory data – not a summary. Download the factory manual and get the exact torque values, clearance specs, and assembly sequence that Mazda engineers wrote. Your rotary will thank you.

Page Count

112

Brand

Mazda

Language

English

3 reviews for Mazda RX-7 Service Manual – Factory Rotary Engine Specs

  1. Robert T.

    I am so happy with this manual. The download is high resolution. Contains clear bolt torque specs for Mazda. I will definitely buy again.

  2. workshop_guy

    I am so happy with this purchase. The text is searchable and easy to navigate. Every wiring layout is provided for Mazda RX. I will definitely buy again.

  3. James L.

    Perfect factory service manual. Instant access after checkout. It assisted me to troubleshoot my Mazda RX electrical connector. Worth every penny.

Add a review

Your email address will not be published. Required fields are marked *

You may also like…