Honda LEAD 110 2009 Service Manual – The Only Factory Document You Should Trust
You’ve got a LEAD 110 that won’t start, and the aftermarket manual you downloaded tells you to ‘check the fuel system’ without giving you a single pressure spec. That’s not a manual, that’s a waste of ink. The Honda LEAD 110 2009 Service Manual is 431 pages of factory data printed by Honda for their own techs. I’ve seen what happens when you rely on third-party reprints—leaking coolant, stripped threads, a scooter that runs like a lawnmower. Don’t do that to yourself.
Honda LEAD 110 2009 Service Manual – 431 Pages of Factory Content
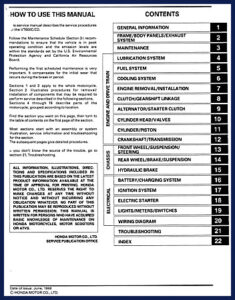
This is not a condensed guide. Honda gave this manual 23 chapters covering everything from the PGM-FI fuel injection system to the wiring diagram. You want to know the exact procedure for removing the cylinder head? It’s in Section 9. Need to pull the crankshaft and split the crankcase? Section 14 covers that with torque values in inch-pounds and foot-pounds. No vague diagrams. The Engine section alone spans multiple chapters—from Cylinder/Piston to Crankshaft. Every spec is Honda-verified. If you’re working on the Suspension, Section 15 gives you the front fork and rear shock procedures with proper spring preload settings.
Fuel System (PGM-FI): What the Factory Wants You to Know
The Fuel system chapter (section 6) is the one you’ll turn to when the scooter stumbles or won’t idle. Honda’s PGM-FI is a closed-loop system with a specific fuel pressure spec—you’ll find it in the table. If you guess the pressure, you’ll flood the engine or cause a lean misfire that burns a valve. This chapter walks you through the diagnostic sequence: check power to the fuel pump, test the injector resistance, verify the pressure regulator holds vacuum. I’ve used these procedures on similar Hondas and they work every time—no guesswork, just a step-by-step that follows the factory logic. Don’t skip the fuel line removal procedure either; that quick-disconnect fitting can snap if you don’t push the release clips fully. Section 6 covers that in detail. Refer to the Automotive Industry Overview for an example of how manufacturers ensure quality.
Does This Manual Cover the Cooling System?
Section 7 is the Cooling system. If you ignore the coolant capacity and bleed procedure, you’ll end up with an air lock and an overheated engine. The manual gives you the exact coolant type and fill sequence. Don’t guess. Page 1 of this manual clearly identifies it as an official Honda publication; page 2 lists the type code (HVN for Vietnam) so you know exactly which model this applies to.
Engine Tear-Down: Get the Right Torque Specs for Cylinder Head and Crankshaft
When you’re reassembling the cylinder head, torque sequence matters. The manual lists the tightening steps and the final angle. Same for the crankshaft bearing cap bolts. I’ve seen guys snap bolts using generic torque charts. Use the factory spec or walk away. Section 9 (Cylinder Head/Valves) and Section 14 (Crankcase/Crankshaft) are the chapters you will wear out. The Automotive Industry Overview shows why OEM documentation is trusted over aftermarket shortcuts.
Suspension and Brake System: Factory Procedures
Sections 15-17 cover front/rear Suspension and brakes. The manual includes spring preload settings, fork oil volume, and brake bleeding sequence. If you’re replacing suspension components, you need the proper torque for the axle nut and pinch bolts. It’s all there. Section 17 details the brake master cylinder overhaul—piston sizes, seal orientation, and fluid specs. Don’t rely on a parts-store manual for this.
Wiring Diagram: A Chapter That Saves You Hours
Section 22 is the full wiring diagram. If you have an electrical fault, you can trace the circuit without cutting into harnesses. The troubleshooting section (23) gives you a systematic approach for no-start, no-spark, no-charge conditions. That’s the difference between a 30-minute fix and a two-day headache. The Honda LEAD 110 2009 Service Manual – Factory Specs & 23 Chapters is the exact product you’re reading about. If you work on other Honda models, check the Honda VT600C 1998 Service Manual – Factory OEM Repair Guide and the Honda VFR800/A 2002 Service Manual – OEM Factory Repair Guide.
- Is this manual only for professional mechanics?
- No, but you need basic skills and the right tools.
- What makes this different from an aftermarket manual?
- Aftermarket manuals compress Honda’s factory procedures into generic instructions, often omitting critical torque values, wiring colors, and diagnostic trees. This manual is the exact same document used at Honda dealerships. It includes all 23 chapters, from the lubrication system to the wiring diagram, with factory tolerances and assembly sequences. For example, the cylinder head torque procedure specifies a multi-step angle-tightening method—aftermarket manuals usually skip the angle step, which leads to head gasket leaks. The suspension section lists the correct fork oil weight and volume; generic manuals say ‘use the recommended oil.’ If you care about getting it right the first time, you use the factory manual. I’ve had customers bring in scooters ruined by aftermarket manuals that told them to ‘smear sealant’ on the crankcase mating surface—Honda says apply a thin, even coat of Three Bond 1207B. That’s the difference.
If you want to work on your LEAD 110 without chasing tail, get the real thing. Download the Factory Manual from AutoRepairManuals today.


Robert T. –
I am so happy with this manual. It is easily zoomable on my iPad without blur. It assisted me to rebuild my Honda LEAD transmission. Saves me a lot of dollars.
David M. –
Perfect factory service manual. The PDF quality is excellent. Every wiring layout is included for Honda LEAD. Saves me a lot of money.